


Published on:2022-03-04
The number of views:


Canary Release in Kubernetes with Nginx Ingress
An increasing number of applications are running in cloud-native environments nowadays. Application developers have to effectively develop, build, test, and release their cloud-native applications while minimizing errors in code and reducing impacts on users. One way to address this challenge is to implement canary releases.
This article gives a quick look on the concept of canary release, and then focuses on how to implement a canary release in Kubernetes with Nginx Ingress.
What is Canary Release
Overview
Canary release is an application deployment method that makes new application features available to a limited portion of users. Canary release is widely adopted in the process of continuous delivery for a variety of benefits, such as:
- Rollout control: Rollout control can be realized over the new application version by allowing a small subset of users to use the canary release before a complete rollout.
- Easy rollback: Rollback can be quickly implemented in case of any bugs or issues.
- Real-world testing: With canary release, real-world testing can be conducted in a small scale without exposing all users to potential bugs or issues.
Canary Release with Nginx Ingress
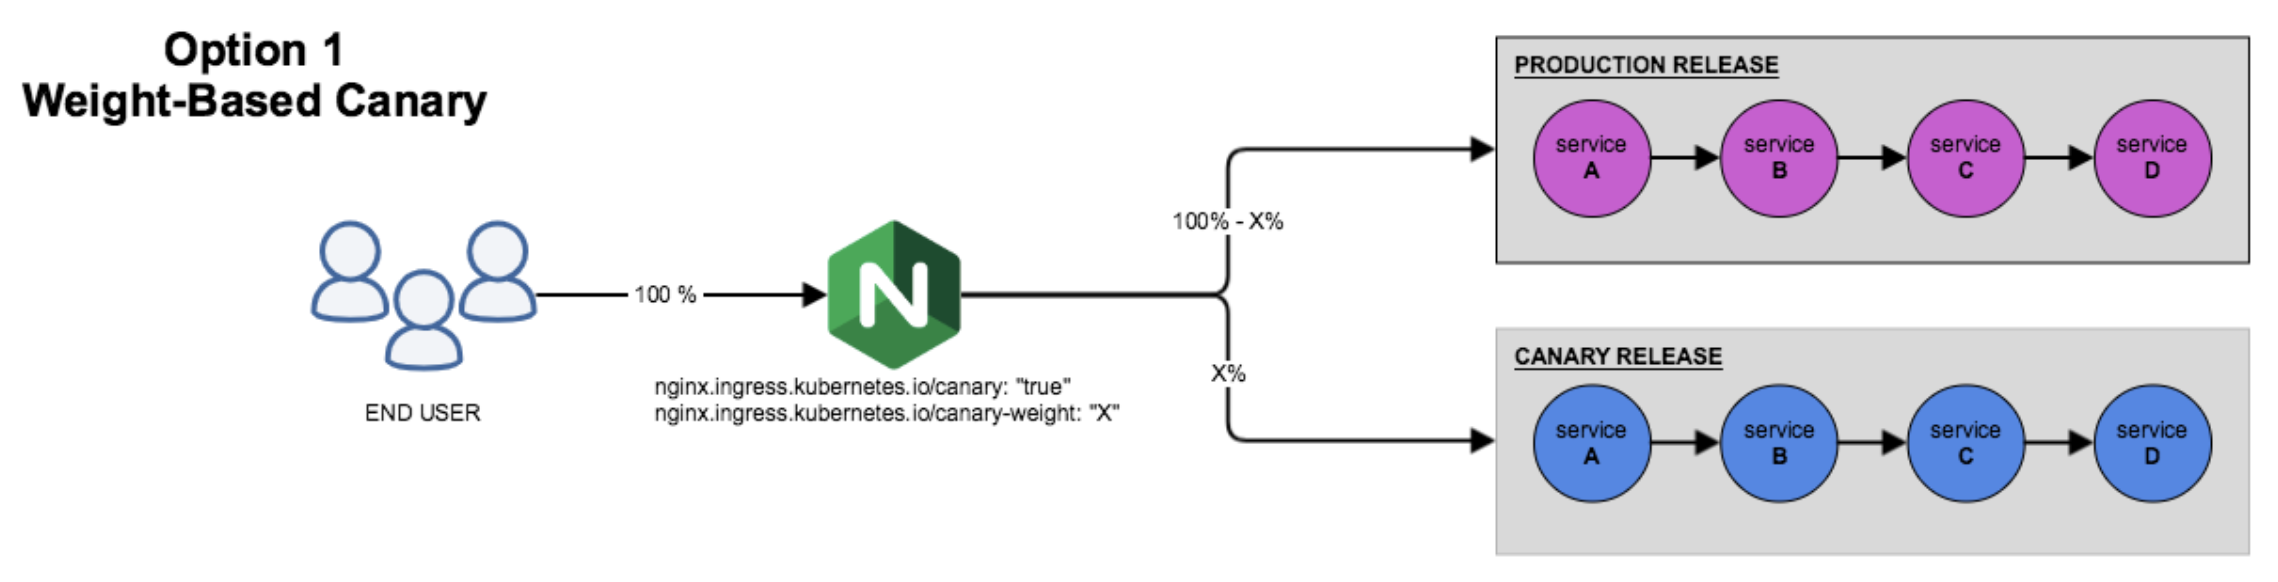
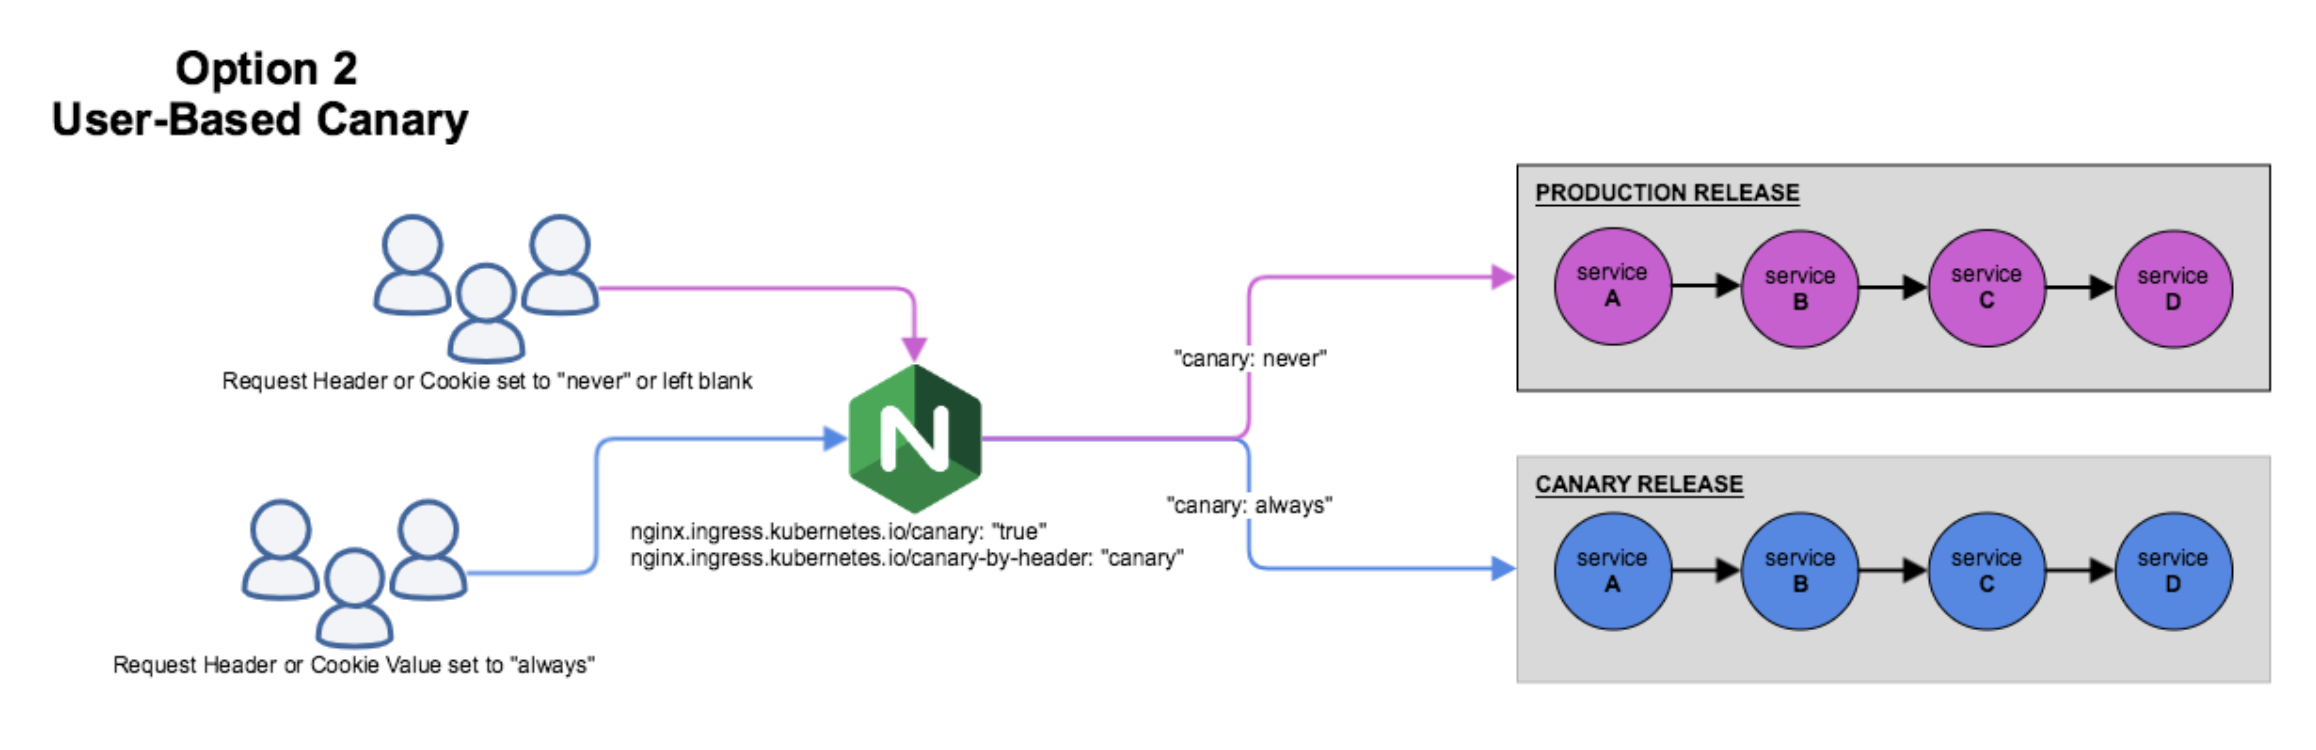
Nginx Ingress has brought a new feature of canary annotations. You can use these canary annotations to configure multiple backend services for your gateway entry and to control traffic allocations. After you set nginx.ingress.kubernetes.io/canary: "true" for an Ingress, you can use the following annotations for canary rules:
nginx.ingress.kubernetes.io/canary-by-headernginx.ingress.kubernetes.io/canary-by-header-valuenginx.ingress.kubernetes.io/canary-weightnginx.ingress.kubernetes.io/canary-by-cookie
Note
The above rules will be assessed according to the priority sequence:
canary-by-header > canary-by-cookie > canary-weight. For more information, see this document.Generally, the above rules can be divided into the following two categories:
-
Weight-based canary release rules
-
User-based canary release rules
Canary Release in Kubernetes with Nginx Ingress
Now, how to implement a canary release in Kubernetes with Nginx Ingress? Let's do a weight-based one together.
Prerequisites
To prepare a Kubernetes cluster, you can refer to this blog. In this article, let's set up a Kubernetes cluster with KubeSphere installed.
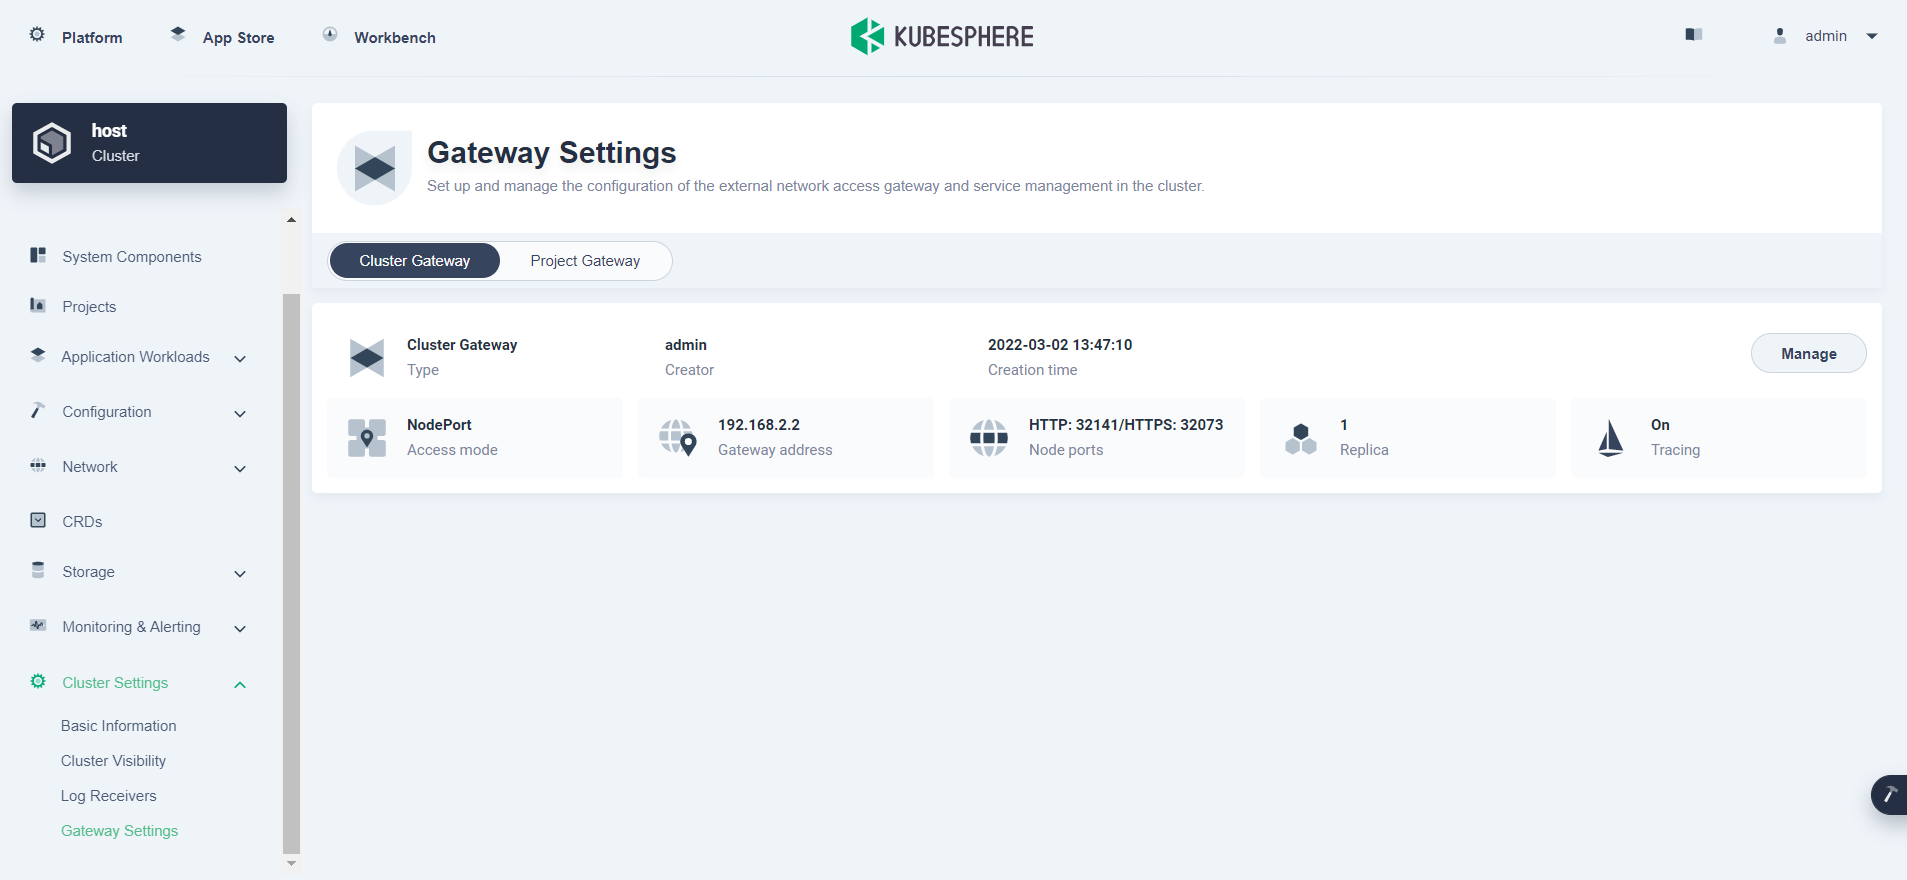
Enable Cluster Gateway
-
Log in to the KubeSphere web console as
admin. Go to Platform > Cluster Management > Cluster Settings > Gateway Settings and click Enable Gateway on the Cluster Gateway tab. -
In the displayed dialog box, select the NodePort access mode for the gateway and click OK.
-
You can view the details of the gateway on the page.
Create an application
-
Let's create a namespace first.
kubectl create ns ingress-demo -
Create a YAML file
production.yamlwith the following content.apiVersion: apps/v1 kind: Deployment metadata: name: production labels: app: production spec: replicas: 1 selector: matchLabels: app: production template: metadata: labels: app: production spec: containers: - name: production image: mirrorgooglecontainers/echoserver:1.10 ports: - containerPort: 8080 env: - name: NODE_NAME valueFrom: fieldRef: fieldPath: spec.nodeName - name: POD_NAME valueFrom: fieldRef: fieldPath: metadata.name - name: POD_NAMESPACE valueFrom: fieldRef: fieldPath: metadata.namespace - name: POD_IP valueFrom: fieldRef: fieldPath: status.podIP --- apiVersion: v1 kind: Service metadata: name: production labels: app: production spec: ports: - port: 80 targetPort: 8080 protocol: TCP name: http selector: app: production -
Run the following command to apply it.
kubectl apply -f production.yaml -n ingress-demo
Create an ingress
Since the application is ready now, let's create an Ingress for it.
-
Create a file
production.ingresswith the following content.apiVersion: extensions/v1beta1 kind: Ingress metadata: name: production annotations: kubernetes.io/ingress.class: nginx spec: rules: - host: kubesphere.io http: paths: - backend: serviceName: production servicePort: 80 -
Run the following command to apply it.
kubectl apply -f production.ingress -n ingress-demo -
Run the following command to access the application.
$ curl --resolve kubesphere.io:32141:192.168.2.2 kubesphere.io:32141

Hostname: production-5d84fbdb58-964mq

Pod Information:
	node name:	qkcp
	pod name:	production-5d84fbdb58-964mq
	pod namespace:	ingress-demo
	pod IP:	10.233.96.107

Server values:
	server_version=nginx: 1.13.3 - lua: 10008

Request Information:
	client_address=10.233.96.105
	method=GET
	real path=/
	query=
	request_version=1.1
	request_scheme=http
	request_uri=http://kubesphere.io:8080/

Request Headers:
	accept=*/*
	host=kubesphere.io:32141
	user-agent=curl/7.29.0
	x-forwarded-for=192.168.2.2
	x-forwarded-host=kubesphere.io:32141
	x-forwarded-port=80
	x-forwarded-proto=http
	x-forwarded-scheme=http
	x-real-ip=192.168.2.2
	x-request-id=5f525b4511d9b4ba7f86f2ed9c90ab5f
	x-scheme=http

Request Body:
	-no body in request-
Note
192.168.2.2is the gateway address of the projectingress-demoand32141is the node port. You need to replace them with the actual values from your environment.
Create a canary version of the application
Next, let's create a canary version of the application to implement a canary release.
-
Create a YAML file
canary.yamlwith the following content.apiVersion: apps/v1 kind: Deployment metadata: name: canary labels: app: canary spec: replicas: 1 selector: matchLabels: app: canary template: metadata: labels: app: canary spec: containers: - name: production image: mirrorgooglecontainers/echoserver:1.10 ports: - containerPort: 8080 env: - name: NODE_NAME valueFrom: fieldRef: fieldPath: spec.nodeName - name: POD_NAME valueFrom: fieldRef: fieldPath: metadata.name - name: POD_NAMESPACE valueFrom: fieldRef: fieldPath: metadata.namespace - name: POD_IP valueFrom: fieldRef: fieldPath: status.podIP --- apiVersion: v1 kind: Service metadata: name: canary labels: app: canary spec: ports: - port: 80 targetPort: 8080 protocol: TCP name: http selector: app: canary -
Run the following command to apply it.
kubectl apply -f canary.yaml -n ingress-demo
Set a weight-based canary release
-
Create a file
weighted-canary.ingresswith the following content.apiVersion: extensions/v1beta1 kind: Ingress metadata: name: canary annotations: kubernetes.io/ingress.class: nginx nginx.ingress.kubernetes.io/canary: "true" nginx.ingress.kubernetes.io/canary-weight: "30" spec: rules: - host: kubesphere.io http: paths: - backend: serviceName: canary servicePort: 80 -
Run the following command to apply it.
kubectl apply -f weighted-canary.ingress -n ingress-demo -
Run the following command to verify the weight-based canary release.
Note
Although we set 30% traffic to the canary version of the application, the actual traffic ratio may fluctuate to a small extent.for i in $(seq 1 10); do curl -s --resolve kubesphere.io:32141:192.168.2.2 kubesphere.io:32141 | grep "Hostname"; doneThe output may look as follows:
Hostname: canary-c66cf4f8c-zntfs Hostname: production-5d84fbdb58-964mq Hostname: production-5d84fbdb58-964mq Hostname: production-5d84fbdb58-964mq Hostname: production-5d84fbdb58-964mq Hostname: production-5d84fbdb58-964mq Hostname: production-5d84fbdb58-964mq Hostname: canary-c66cf4f8c-zntfs Hostname: production-5d84fbdb58-964mq Hostname: canary-c66cf4f8c-zntfs -
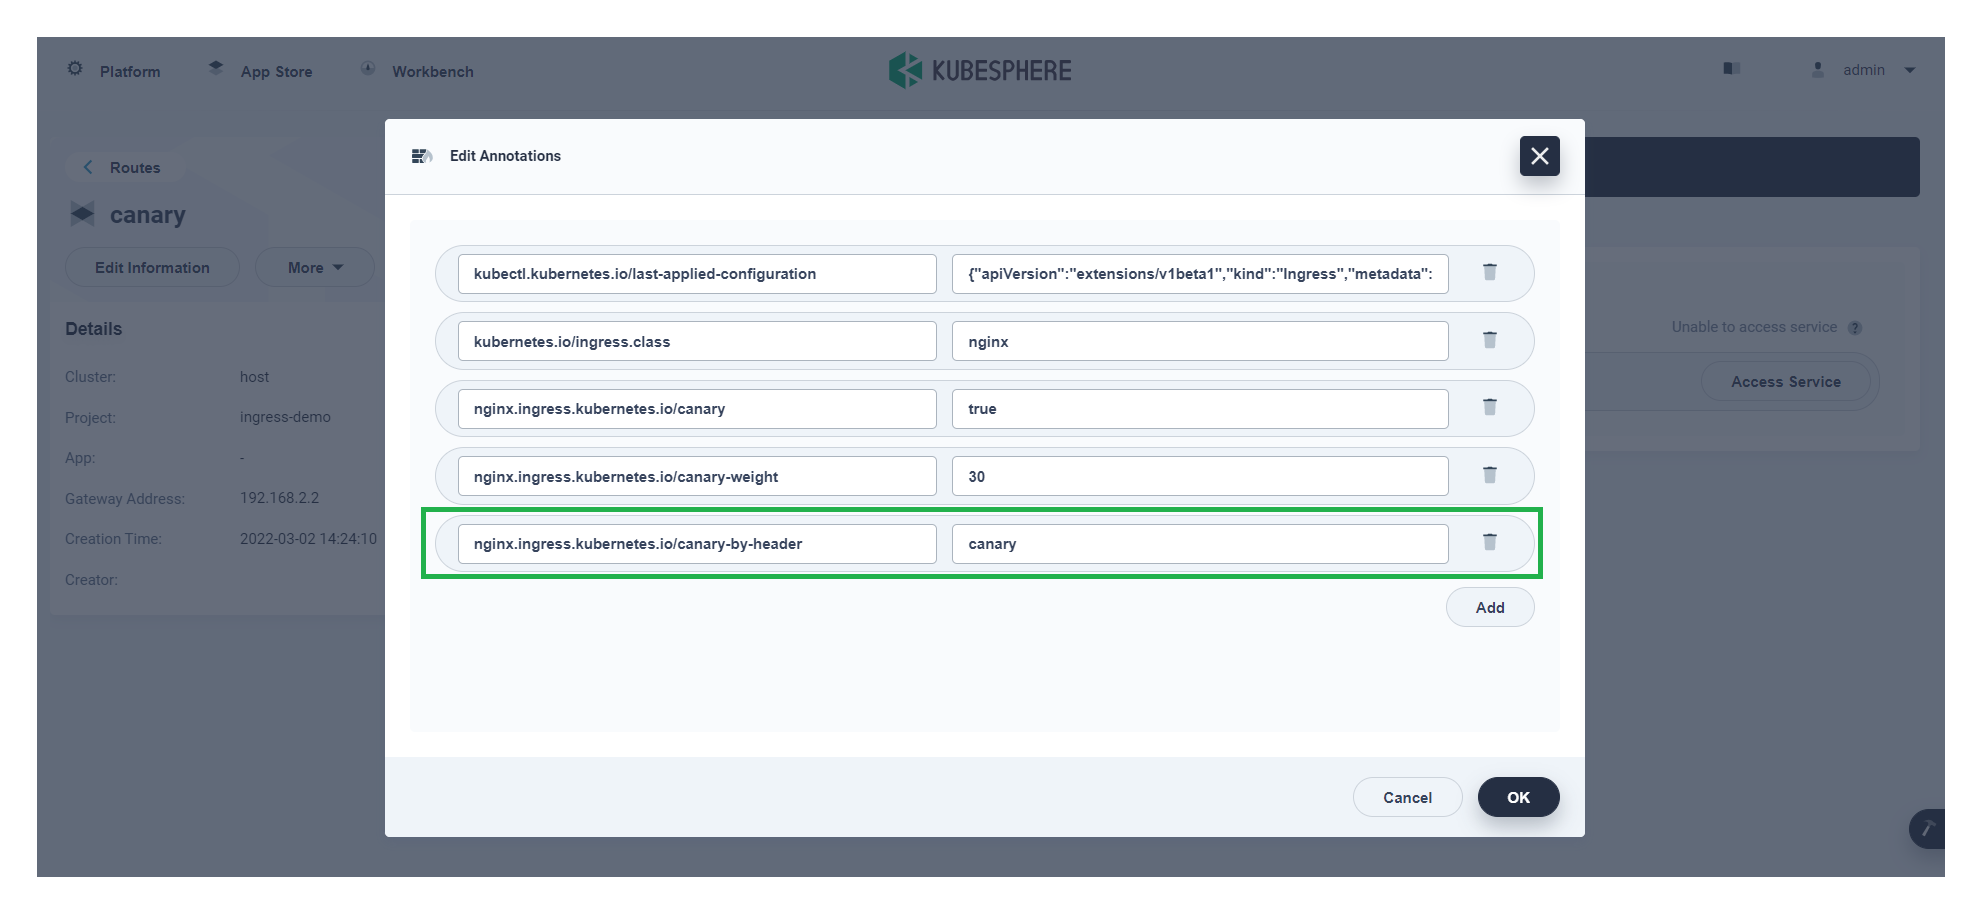
The weight-based canary release is implemented. If you want to use other annotations for canary rules, you can add annotations to the ingress on the KubeSphere web console.
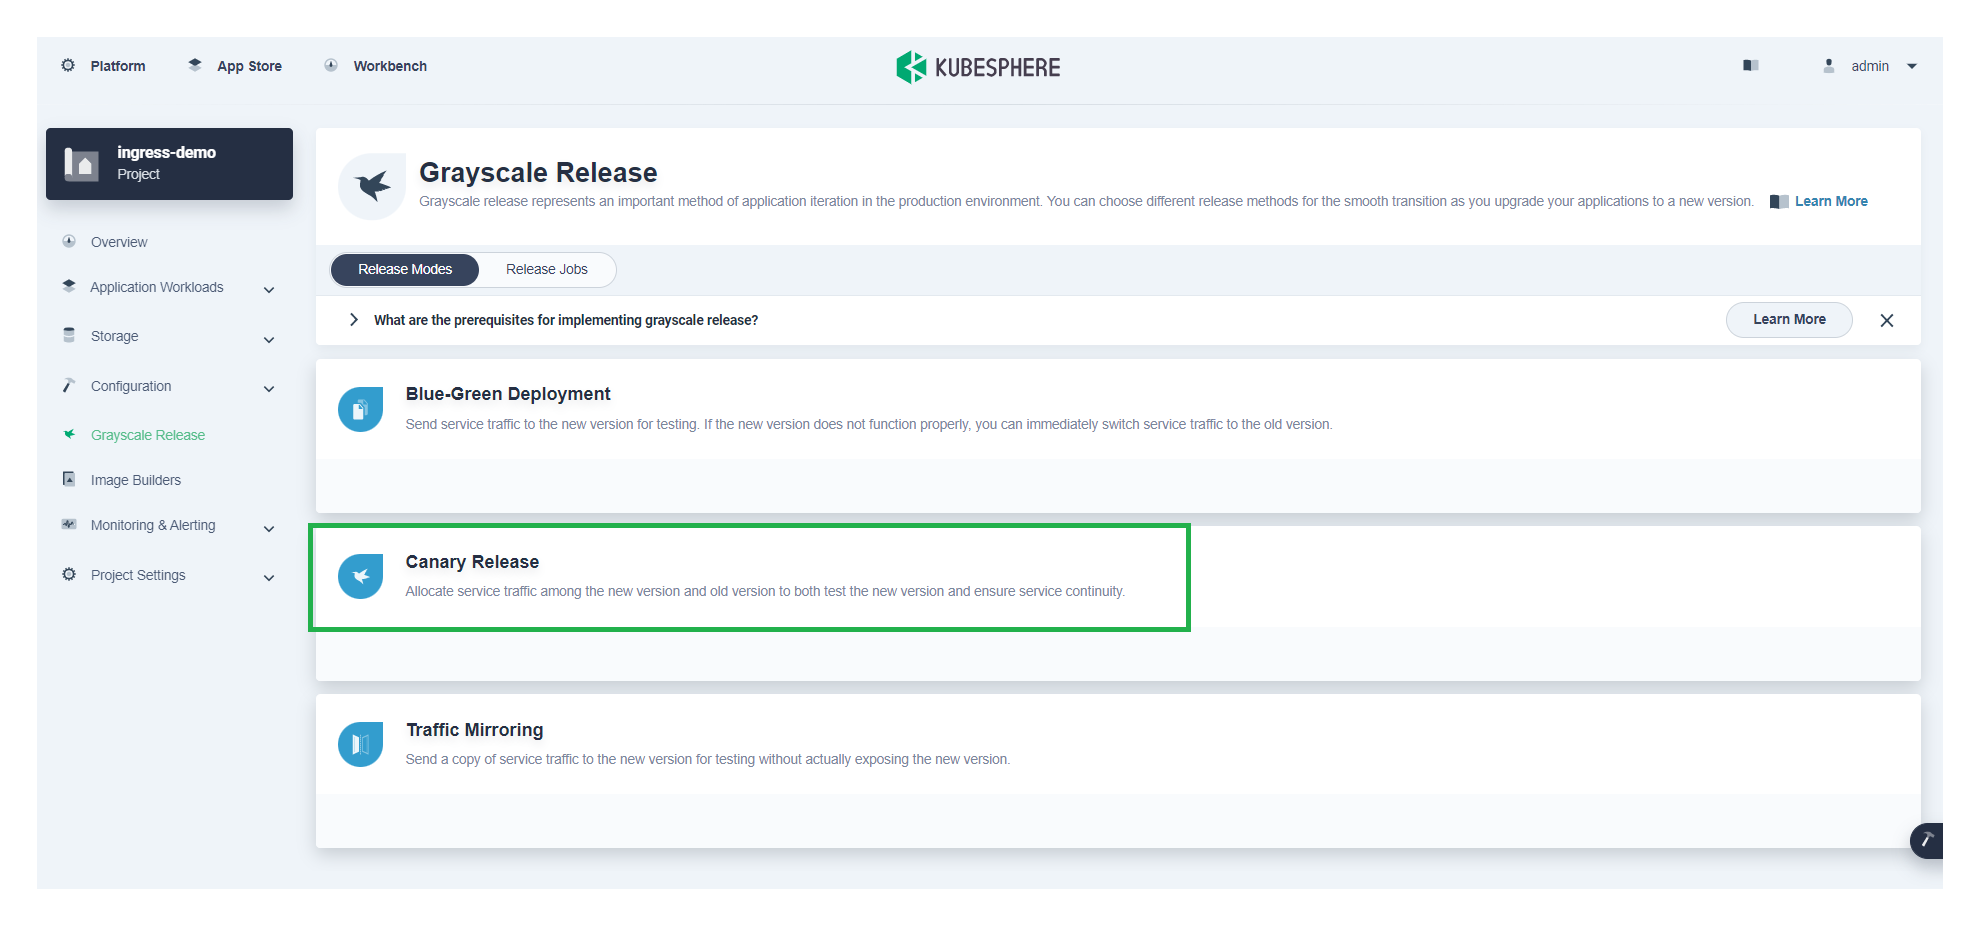
Canary release on KubeSphere
Based on Istio, KubeSphere provides users with necessary control to deploy canary services. All the canary configurations can be made on its wizard web console. For more information, see Canary Release.

Recap
This article hopes to help you understand how to implement canary release in Kubernetes with Nginx Ingress through real-world practices. As cloud-native technologies continue to gain momentum, canary release will be helpful when it comes to improving application development workflow.
Reference
Nginx Ingress Controller - Annotations
Table of Contents
